


goingnowhereslowly
Pack Dog
I recently closed my eyes and pulled the trigger on a 2006 with about 37k km on it. For the transfer of ownership it is required that the bike pass a roadworthy test, but the front brake didn't light up the tail light. No biggie.
I shorted the two wires that plugs into the switch at the front lever which got the rear brake light to come on. :hello2: I was glad it was just the switch")
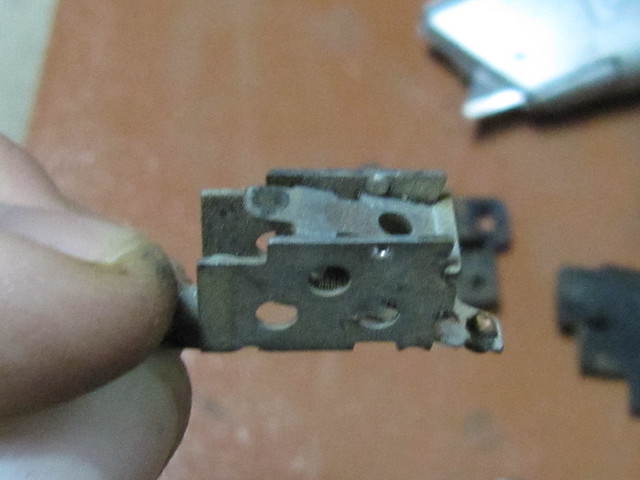
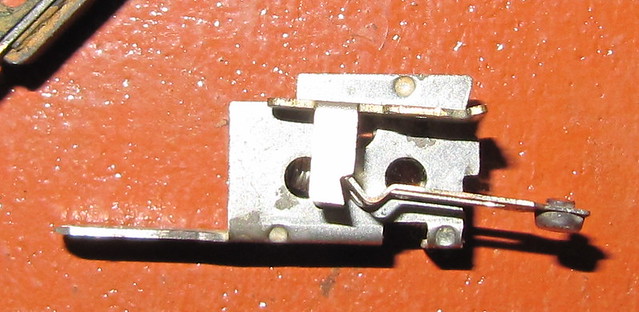
I removed the switch (just one small screw) and used a Stanley knife to loosen all around the join of the two pieces of plastic.
NOTE, I didn't actually cut anything, I got the impression the two pieces just clips together but over time got a bit more stuck; just a gently nudge was necessary.
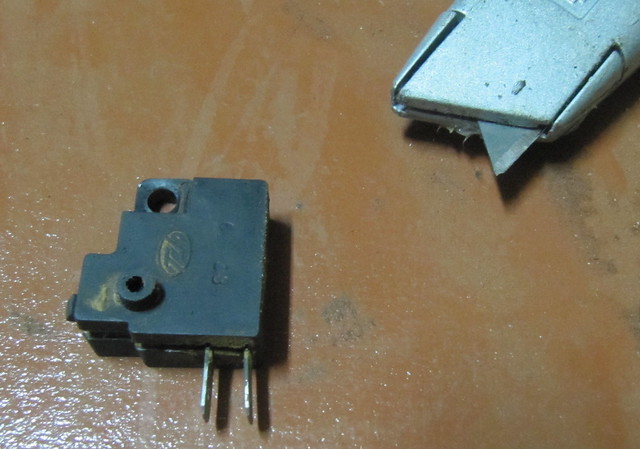
[pic 1]
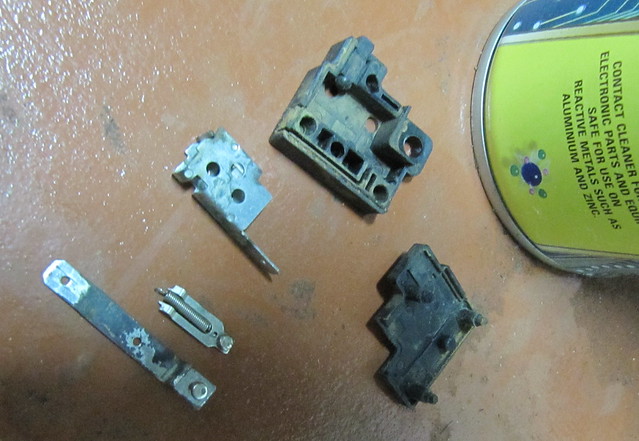
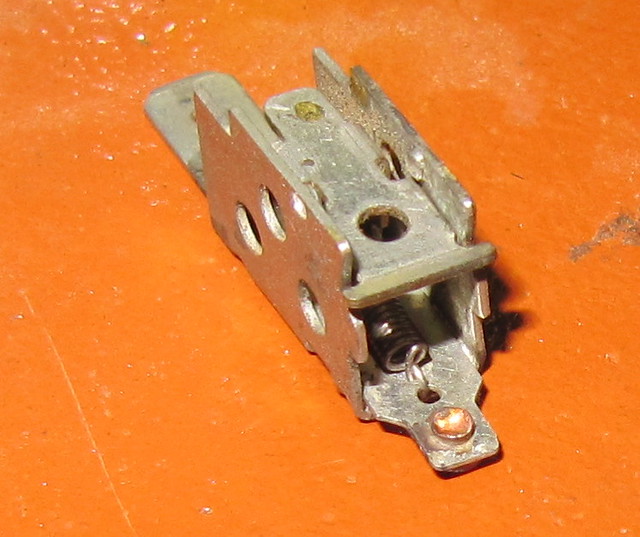
There are two metal bits that sits inside the plastic, they can be pulled out easily.
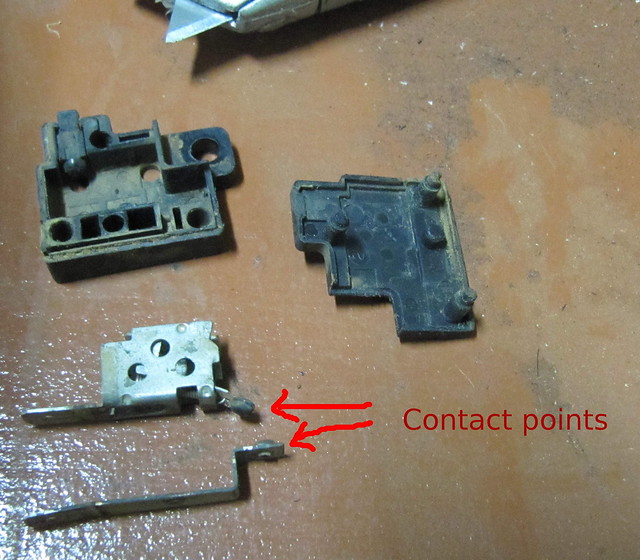
[pic 2]
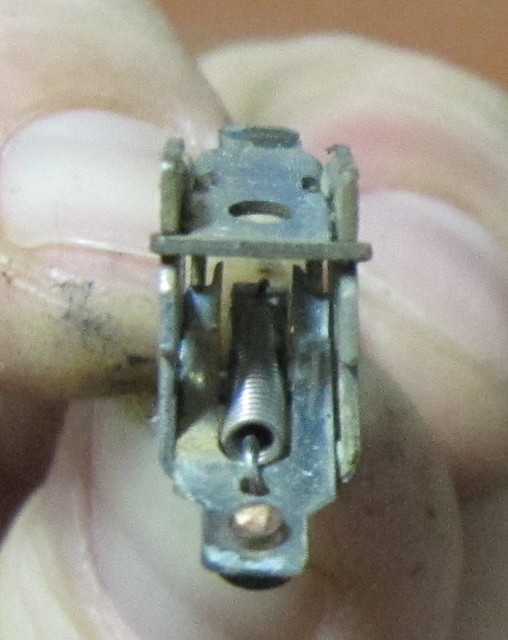
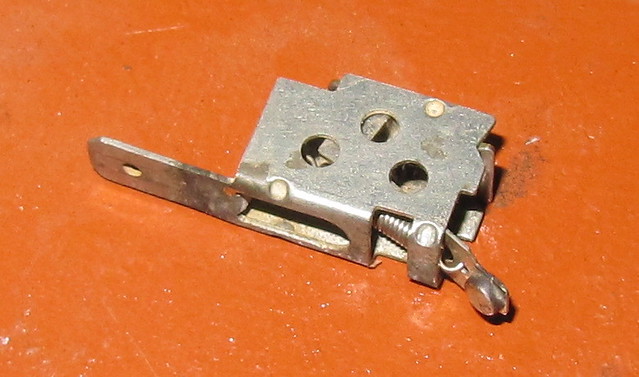
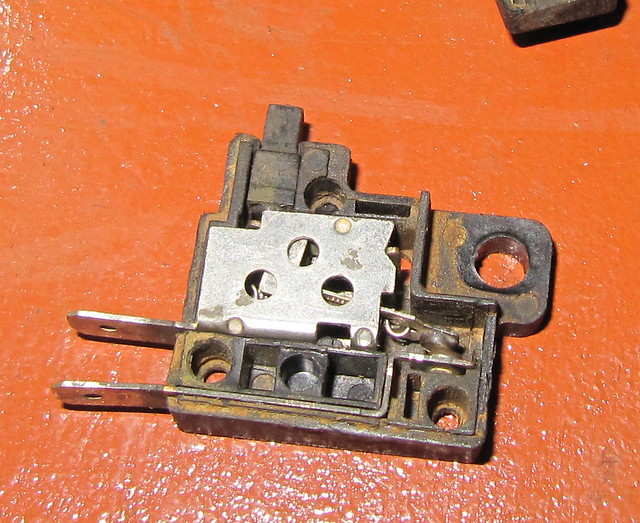
Close-ups of the one part that houses the mechanical switch
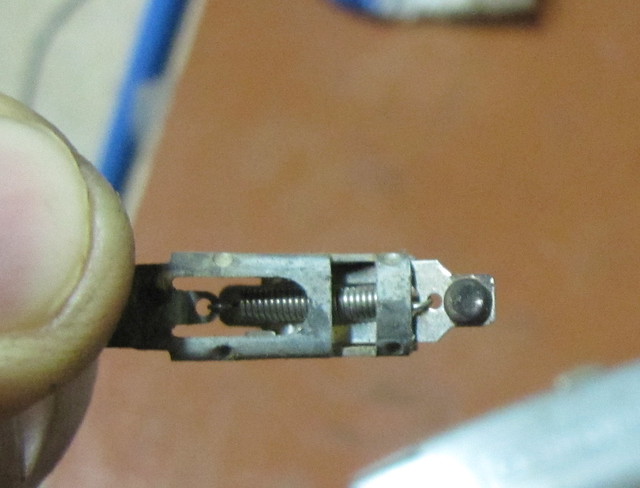
[pic 3]
[pic 4]
[pic 5]
I pulled the switch apart even further to find the lever and spring. It would've probably been wise to do this carefully in the house at a desk rather than standing in the middle of the garage where I could drop and loose the small parts :eek7:
[pic 6]
These contact points were not clean, it looks like it due to lots of friction over time left residue. I cleaned this with electric cleaner, but any contact cleaner would probably work, these don't appear delicate. There are bits of copper in there though.
Sooooo, in retrospect I probably didn't need to pull the mechanical switch thingamabobbee apart, it took me probably about half an hour to figure out how to put the damn thing back together, but hey, this is what we call fun right! ;D
This shows the orientation of the two parts to each other when they go into the frame of the switch.
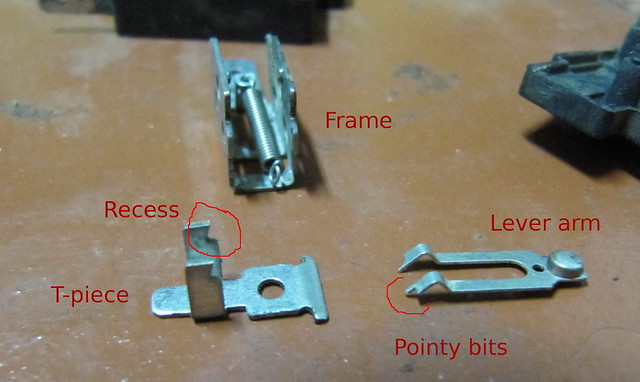
[pic 7]
When assembled inside the frame, those tiny edges actually fits together:
[pic 8]
Here I try to show the parts as they sit relative to the frame, but in this case those two parts are on top of the frame instead of inside. So imagine you're able to see through the frame's side, then you'd see those two pieces like this (excluding the spring):
[pic 9]
The hardest part is getting the spring hooked on the frame and then onto the level with everything in place.
I found that the simplest to be to hook the spring into the frame first, with the hook going into the frame to go in from the top down. Then slide the lever in from the right (in the prev picture) and hook the other end of the spring from the bottom through the hole.
Now put the T-piece into the frame from the top and place the nubs in position. Then pull the lever to the right and hook its pointy bits into the recess' of the T-piece.
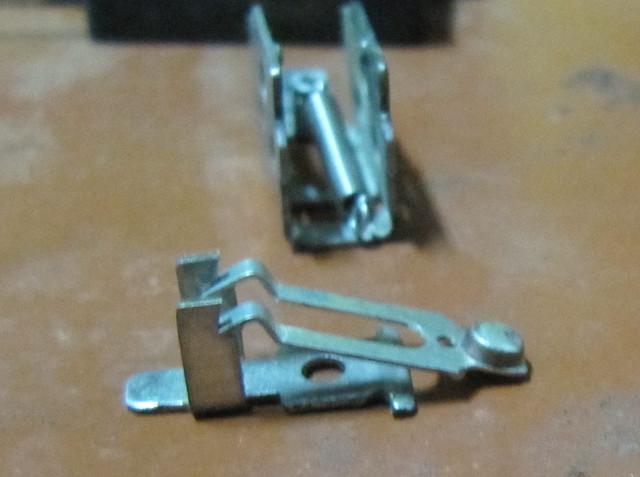
More angles:
(img 10)
(img 11)
Putting it back into the plastic body

(img 12)
(img 13)
When fitting the switch, when the brake lever is not pulled, the switch is depressed and the contact points apart. When you pull the lever, it lets go of the switch and the contact points come together.
Video:
https://youtu.be/qV1RG6y84mM
I shorted the two wires that plugs into the switch at the front lever which got the rear brake light to come on. :hello2: I was glad it was just the switch
I removed the switch (just one small screw) and used a Stanley knife to loosen all around the join of the two pieces of plastic.
NOTE, I didn't actually cut anything, I got the impression the two pieces just clips together but over time got a bit more stuck; just a gently nudge was necessary.
[pic 1]
There are two metal bits that sits inside the plastic, they can be pulled out easily.
[pic 2]
Close-ups of the one part that houses the mechanical switch
[pic 3]
[pic 4]
[pic 5]
I pulled the switch apart even further to find the lever and spring. It would've probably been wise to do this carefully in the house at a desk rather than standing in the middle of the garage where I could drop and loose the small parts :eek7:
[pic 6]
These contact points were not clean, it looks like it due to lots of friction over time left residue. I cleaned this with electric cleaner, but any contact cleaner would probably work, these don't appear delicate. There are bits of copper in there though.
Sooooo, in retrospect I probably didn't need to pull the mechanical switch thingamabobbee apart, it took me probably about half an hour to figure out how to put the damn thing back together, but hey, this is what we call fun right! ;D
This shows the orientation of the two parts to each other when they go into the frame of the switch.
[pic 7]
When assembled inside the frame, those tiny edges actually fits together:
[pic 8]
Here I try to show the parts as they sit relative to the frame, but in this case those two parts are on top of the frame instead of inside. So imagine you're able to see through the frame's side, then you'd see those two pieces like this (excluding the spring):
[pic 9]
The hardest part is getting the spring hooked on the frame and then onto the level with everything in place.
I found that the simplest to be to hook the spring into the frame first, with the hook going into the frame to go in from the top down. Then slide the lever in from the right (in the prev picture) and hook the other end of the spring from the bottom through the hole.
Now put the T-piece into the frame from the top and place the nubs in position. Then pull the lever to the right and hook its pointy bits into the recess' of the T-piece.
More angles:
(img 10)
(img 11)
Putting it back into the plastic body
(img 12)
(img 13)
When fitting the switch, when the brake lever is not pulled, the switch is depressed and the contact points apart. When you pull the lever, it lets go of the switch and the contact points come together.
Video:
https://youtu.be/qV1RG6y84mM