


[email protected]
Race Dog
DIY Removing & Fitting a Tubeless Tyre for first timers.
So its X-mas holidays or Sunday and no bike shops open and you need to change a tyre at home (or just wanna do it yourself!!)
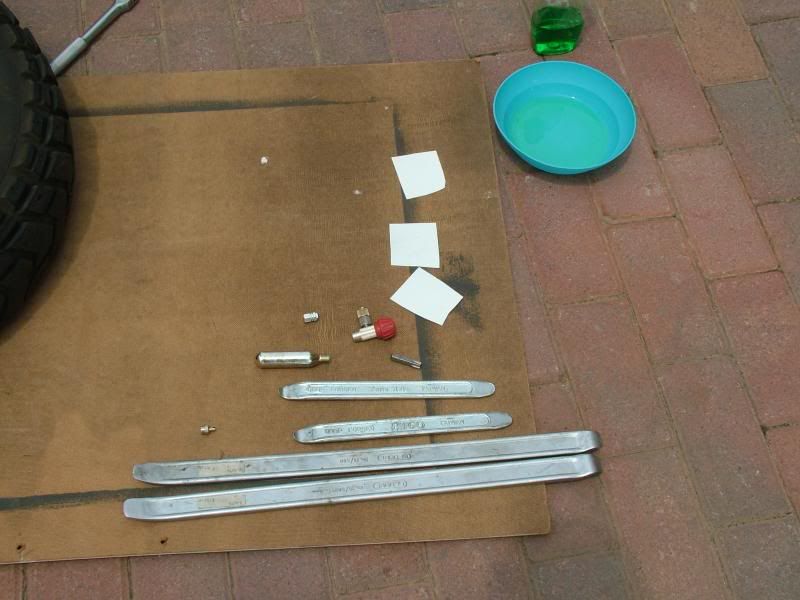
Items needed:
• Pair hard soled boots
• Valve key
• Bead Breaker or Side stand
• 3 x Tyre levers
• 3 x Plastic / leather strips to protect rim from levers (Ice cream tub)
• Dish washing liquid – lube for refitting
• Dish Sponge to clean rim. Carb-cleaner / Handy Andy!
• CO2 bomb / compressor etc to pop the tyre onto the rim.
1. Get your tools and bits ready, then take your bike for a blast (on tar) get your tyre and rim nice a warm, then you’re ready. In this case I changed the rear Heidi K60 which has hard side walls so the warmer the tyre easier! (Std 1200gs Rim)
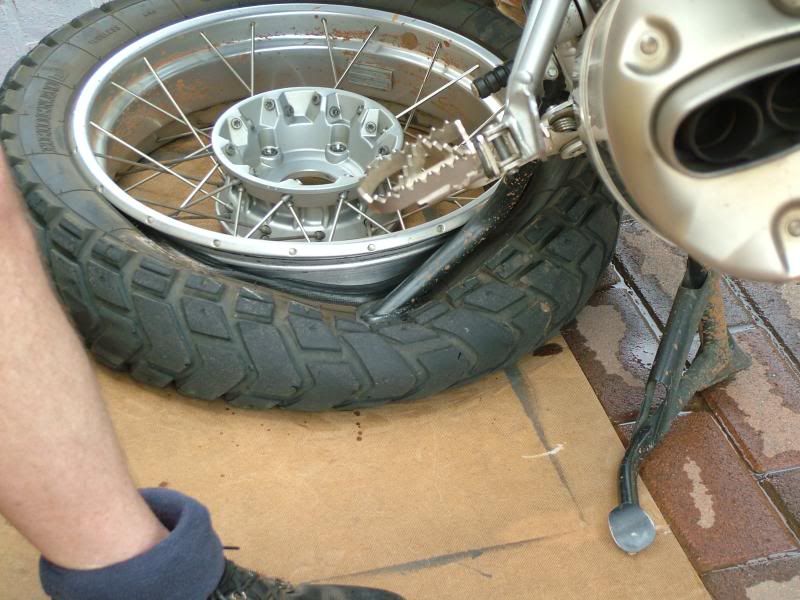
2. Break the bead using the side stand.
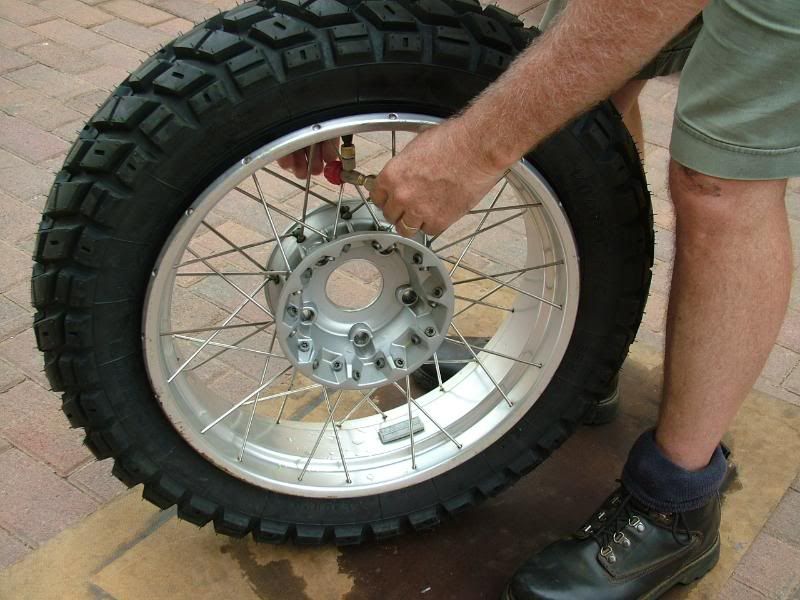
a. Deflate the tyre - Remove the Valve insert.
b. With the bike on the centre stand, use the side stand side stand as a breaker - pull the bike over pushing the bead down with the side stand.
c. The initial bead break can be sticky – so you may need to rock the bike gently letting gravity to the work.
d. If the bead pops back as you lift the weight off, no worries, rotate the wheel 15 to 20 cm and do again and so on until the bead is off the rim.
e. Turn the wheel over and break the bead on the other side.
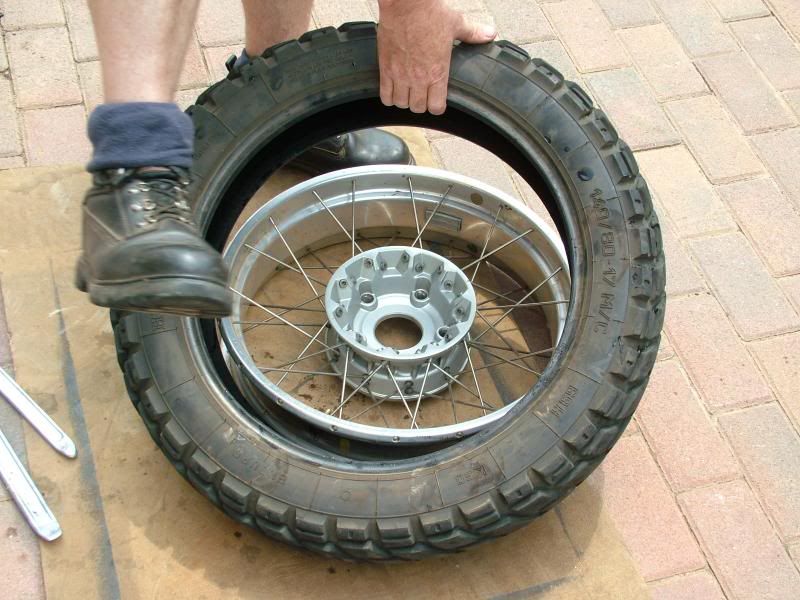
3. Pull the tyre(side 1) off the rim.
a. Using the heel of your boots press down on the side wall – walking all the way around to ensure the entire bead is in the rim centre channel.
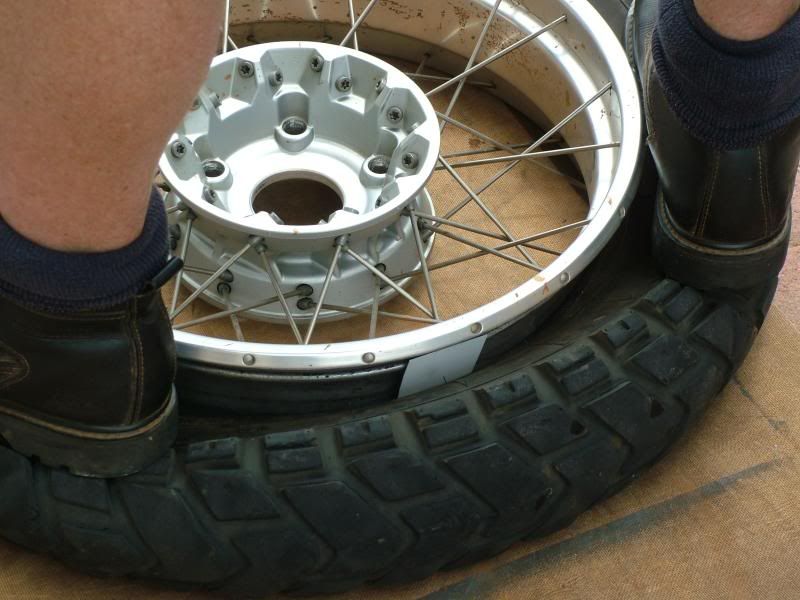
b. Starting at the valve, insert 2 of the tyre levers 15 to 20 cm apart, hooking the bead. Insert plastic or leather protector between the rim an levers.

c. When you lever the tyre over the rim make 100% sure the opposite bead is still sitting properly in the centre channel. If needed stretch a leg over over and press your heal on the opposite side wall to keep the bead in the channel.
d. Insert the 3rd lever and the tyre will quick be off side 1.
e. Use soapy water if needed (should not be necessary).
4. Pull the tyre(side 2) off the rim.
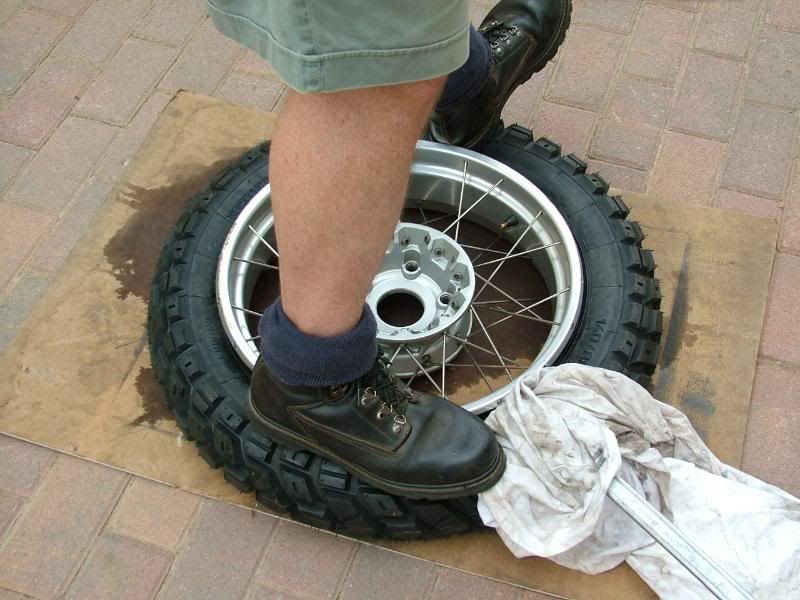
a. From the bottom side of the tyre, insert a tyre lever as in the pic and leave it resting on the ground.
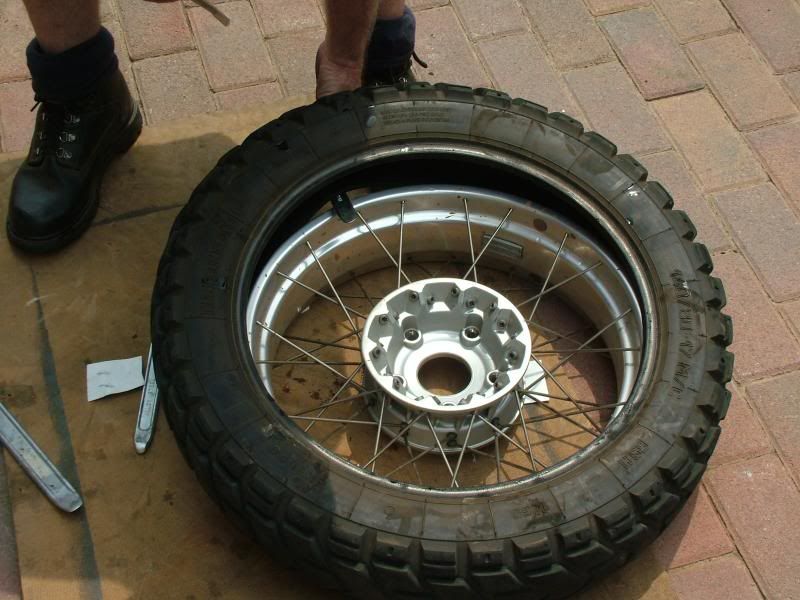
b. Ensure the remaining bead is sitting properly in the channel, stand with one foot on the hub, take a good hold of the tyre above the tyre lever and pull upward – the tyre will peel off.
5. Clean the rim for good seal.
a. Chances are that your rim has rubber residue which you must clean off properly to ensure a snug seal with the new or re-fitted tyre.
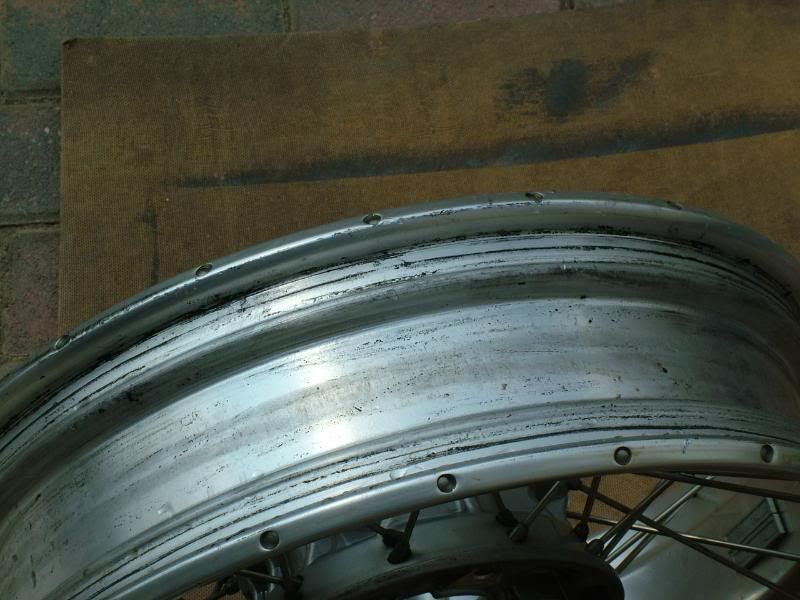
b. I use Carb cleaner and a dish sponge using the green plastic scourer. If you don’t have Carb cleaner Handy Andy will work but with a bit more effort.

6. Fitting the new tyre.
a. With the Heidi and its nasty side walls I recommend you warm the new tyre in the sun. If you have a pool pump housing like this, pop it in and close the lid, it works like a dream.

b. Make sure that the rotation of rim and tyre is correct.
c. First side - Apply a thin even film of dish washing liquid to the face of the bead
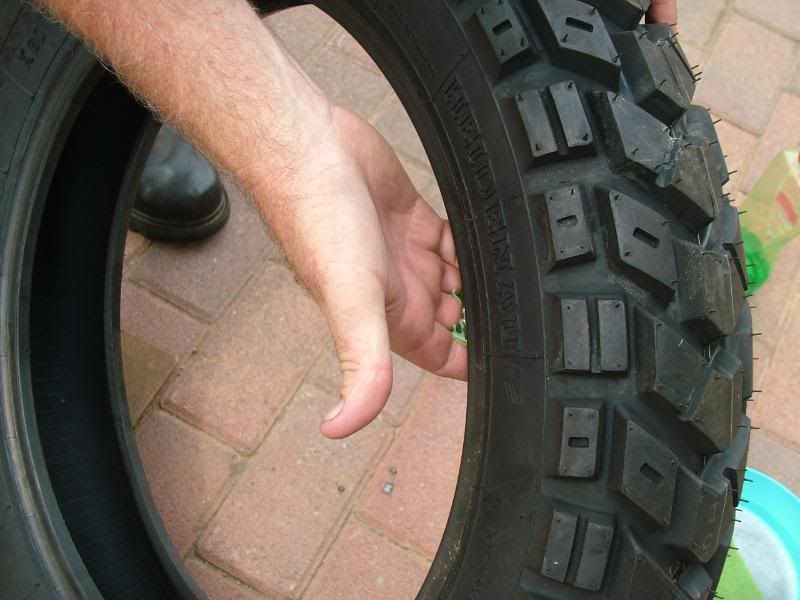
d. Line up the Balance Dots on the tyre with valve.
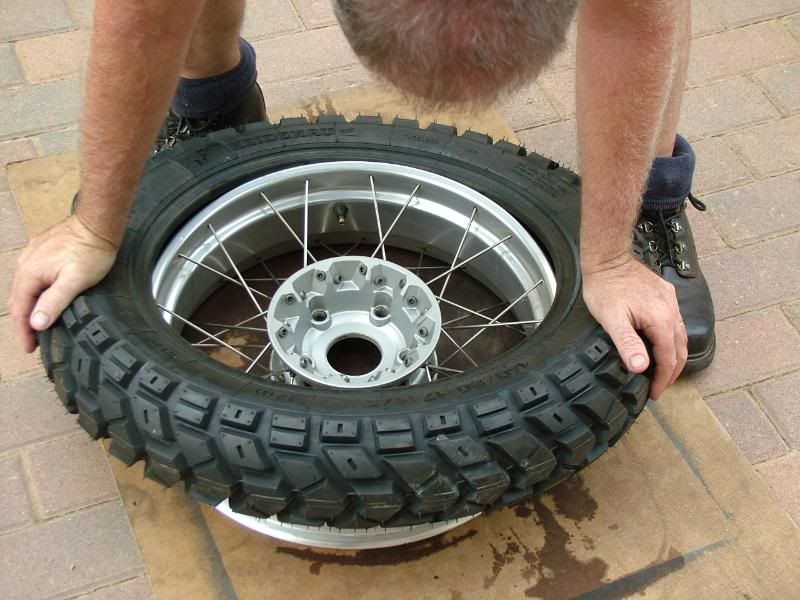
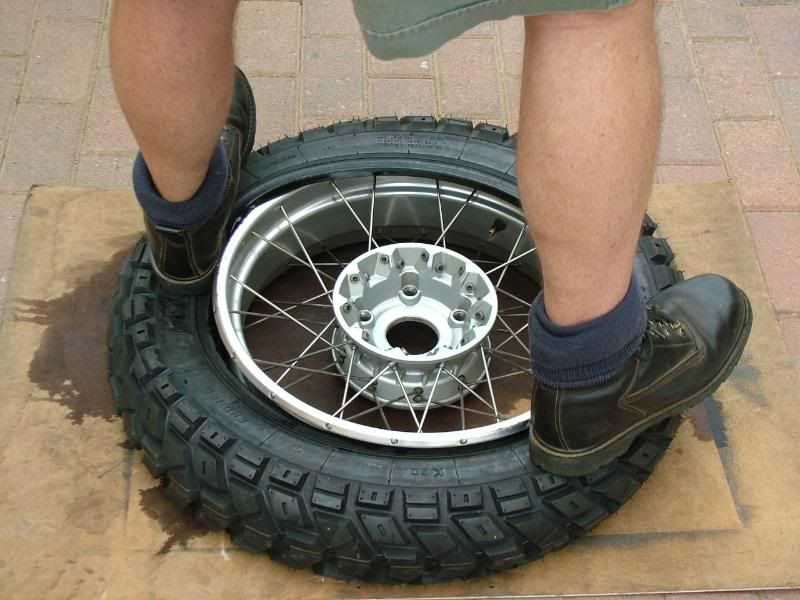
e. Press the bead closest to your feet into the centre channel and just using your body weight press the tyre with your palms in a walking motion – it should pop in easily.
i. If needed, add a little spray of water to the dish liquid to increase the lube.
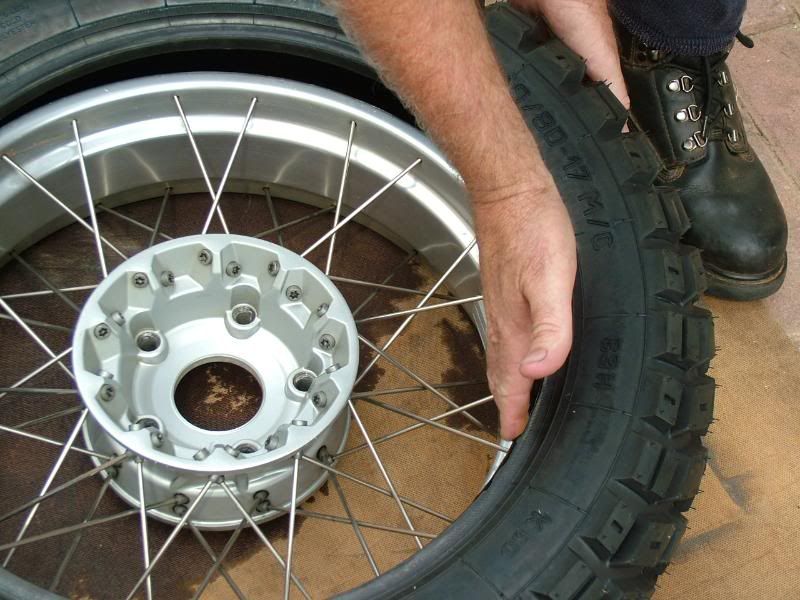
f. Second side – Again apply dish liquid, this time apply to the face of the bead, as well as inner lip of the by curling the tips of your fingers into the tyre.
g. Start opposite the valve, finishing at the valve – stand on the tyre, using your heels to press the bead over the rim.
h. Once 2/3 of the bead is over the rim the tyre will start resisting. You will find that if you press down with your left heel, the right will pop off the rim again.
i. Ensure the bead is properly in the centre channel.
ii. Insert a tyre lever into the rim lip, pressing the sidewall down keeping the bead from popping up. As there is no real force on the rim, I just use a cloth so the lever doesn’t scratch the rim. Put a tool box / pot plant, spouse etc. on the end of the lever to keep it in place.
iii. Now you can bounce all your weight with your heel in once place and ease over the last section.
iv. Again, if needed use soapy water.
7. Popping the tyre onto the rim.
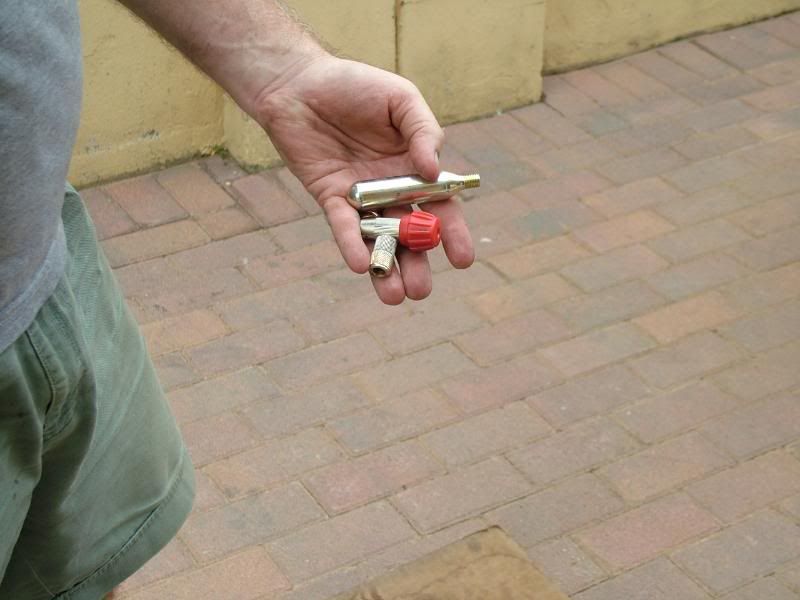
First prise is a proper reservoir compressor. You need a quick burst of air volume so your portable bike or 4x4 compressor with no reservoir is not going to work for you. If you can, turf the wheel in the cage and drive to the garage. In this case I used a CO2 bomb (x 2) with an adjustable valve.
a. Make sure you have a few spare bombs.
b. Replace the valve insert.
c. Hold the wheel vertically and bounce it hard on the tread rotating it forcing the side walls outward.
d. Check both sides that the bead is evenly positioned all the way around the rim, preferably touching the inner side of the bead retainer ridge.
i. If there are any visible gaps between the bead and rim, there is no way it will pop with a CO2 bomb.
ii. Give a last quick even spray with water / dish liquid mix. This ensure good lube but also highlights leak gaps with foamy bubbles .
e. Rotate the wheel until the valve is at the top, recheck for any visible gaps. Give a quick open of the bomb and close to see if there is any “Big” leak gap. In my case there was a leak at the top side (the weight of the rim pushing down, opened a slight gap at the top). Using my left hand I gently lifted the rim upward, then opened the Valve fully and got a partial seat.
f. Note for a flat sealed tyre, a 16g CO2 bomb with give you an approximate 0.8 bar on the first bomb. When popping a tyre onto the rim you will no doubt get quite a bit of leakage initially so 2 or max 3 bombs may be needed.
g. Once seated, let out all the CO2 and pump with air using your bike or 4x4 compressors. If you don’t have a compressor, ride your bike to the garage and do it there.
Good luck.
So its X-mas holidays or Sunday and no bike shops open and you need to change a tyre at home (or just wanna do it yourself!!)
Items needed:
• Pair hard soled boots
• Valve key
• Bead Breaker or Side stand
• 3 x Tyre levers
• 3 x Plastic / leather strips to protect rim from levers (Ice cream tub)
• Dish washing liquid – lube for refitting
• Dish Sponge to clean rim. Carb-cleaner / Handy Andy!
• CO2 bomb / compressor etc to pop the tyre onto the rim.
1. Get your tools and bits ready, then take your bike for a blast (on tar) get your tyre and rim nice a warm, then you’re ready. In this case I changed the rear Heidi K60 which has hard side walls so the warmer the tyre easier! (Std 1200gs Rim)
2. Break the bead using the side stand.
a. Deflate the tyre - Remove the Valve insert.
b. With the bike on the centre stand, use the side stand side stand as a breaker - pull the bike over pushing the bead down with the side stand.
c. The initial bead break can be sticky – so you may need to rock the bike gently letting gravity to the work.
d. If the bead pops back as you lift the weight off, no worries, rotate the wheel 15 to 20 cm and do again and so on until the bead is off the rim.
e. Turn the wheel over and break the bead on the other side.
3. Pull the tyre(side 1) off the rim.
a. Using the heel of your boots press down on the side wall – walking all the way around to ensure the entire bead is in the rim centre channel.
b. Starting at the valve, insert 2 of the tyre levers 15 to 20 cm apart, hooking the bead. Insert plastic or leather protector between the rim an levers.
c. When you lever the tyre over the rim make 100% sure the opposite bead is still sitting properly in the centre channel. If needed stretch a leg over over and press your heal on the opposite side wall to keep the bead in the channel.
d. Insert the 3rd lever and the tyre will quick be off side 1.
e. Use soapy water if needed (should not be necessary).
4. Pull the tyre(side 2) off the rim.
a. From the bottom side of the tyre, insert a tyre lever as in the pic and leave it resting on the ground.
b. Ensure the remaining bead is sitting properly in the channel, stand with one foot on the hub, take a good hold of the tyre above the tyre lever and pull upward – the tyre will peel off.
5. Clean the rim for good seal.
a. Chances are that your rim has rubber residue which you must clean off properly to ensure a snug seal with the new or re-fitted tyre.
b. I use Carb cleaner and a dish sponge using the green plastic scourer. If you don’t have Carb cleaner Handy Andy will work but with a bit more effort.
6. Fitting the new tyre.
a. With the Heidi and its nasty side walls I recommend you warm the new tyre in the sun. If you have a pool pump housing like this, pop it in and close the lid, it works like a dream.
b. Make sure that the rotation of rim and tyre is correct.
c. First side - Apply a thin even film of dish washing liquid to the face of the bead
d. Line up the Balance Dots on the tyre with valve.
e. Press the bead closest to your feet into the centre channel and just using your body weight press the tyre with your palms in a walking motion – it should pop in easily.
i. If needed, add a little spray of water to the dish liquid to increase the lube.
f. Second side – Again apply dish liquid, this time apply to the face of the bead, as well as inner lip of the by curling the tips of your fingers into the tyre.
g. Start opposite the valve, finishing at the valve – stand on the tyre, using your heels to press the bead over the rim.
h. Once 2/3 of the bead is over the rim the tyre will start resisting. You will find that if you press down with your left heel, the right will pop off the rim again.
i. Ensure the bead is properly in the centre channel.
ii. Insert a tyre lever into the rim lip, pressing the sidewall down keeping the bead from popping up. As there is no real force on the rim, I just use a cloth so the lever doesn’t scratch the rim. Put a tool box / pot plant, spouse etc. on the end of the lever to keep it in place.
iii. Now you can bounce all your weight with your heel in once place and ease over the last section.
iv. Again, if needed use soapy water.
7. Popping the tyre onto the rim.
First prise is a proper reservoir compressor. You need a quick burst of air volume so your portable bike or 4x4 compressor with no reservoir is not going to work for you. If you can, turf the wheel in the cage and drive to the garage. In this case I used a CO2 bomb (x 2) with an adjustable valve.
a. Make sure you have a few spare bombs.
b. Replace the valve insert.
c. Hold the wheel vertically and bounce it hard on the tread rotating it forcing the side walls outward.
d. Check both sides that the bead is evenly positioned all the way around the rim, preferably touching the inner side of the bead retainer ridge.
i. If there are any visible gaps between the bead and rim, there is no way it will pop with a CO2 bomb.
ii. Give a last quick even spray with water / dish liquid mix. This ensure good lube but also highlights leak gaps with foamy bubbles .
e. Rotate the wheel until the valve is at the top, recheck for any visible gaps. Give a quick open of the bomb and close to see if there is any “Big” leak gap. In my case there was a leak at the top side (the weight of the rim pushing down, opened a slight gap at the top). Using my left hand I gently lifted the rim upward, then opened the Valve fully and got a partial seat.
f. Note for a flat sealed tyre, a 16g CO2 bomb with give you an approximate 0.8 bar on the first bomb. When popping a tyre onto the rim you will no doubt get quite a bit of leakage initially so 2 or max 3 bombs may be needed.
g. Once seated, let out all the CO2 and pump with air using your bike or 4x4 compressors. If you don’t have a compressor, ride your bike to the garage and do it there.
Good luck.